Overview
As in Step 3 of the first tutorial, where we imported the dataset using the UI, in this step we will import the dataset programmatically, in particular using the REST API. We’ll use the CreateDataImportFromUrl endpoint instead of the CreateDataImportFromUpload endpoint. This approach allows us to provide a URL to the dataset rather than uploading a local file, simplifying the process for this tutorial.Import data
Run the cURL command below to import the dataset. Theurl parameter in the request specifies the location of the dataset, which has been provided at that URL for the purposes of this tutorial.
A successful response
A successful response
View imported data in Sift
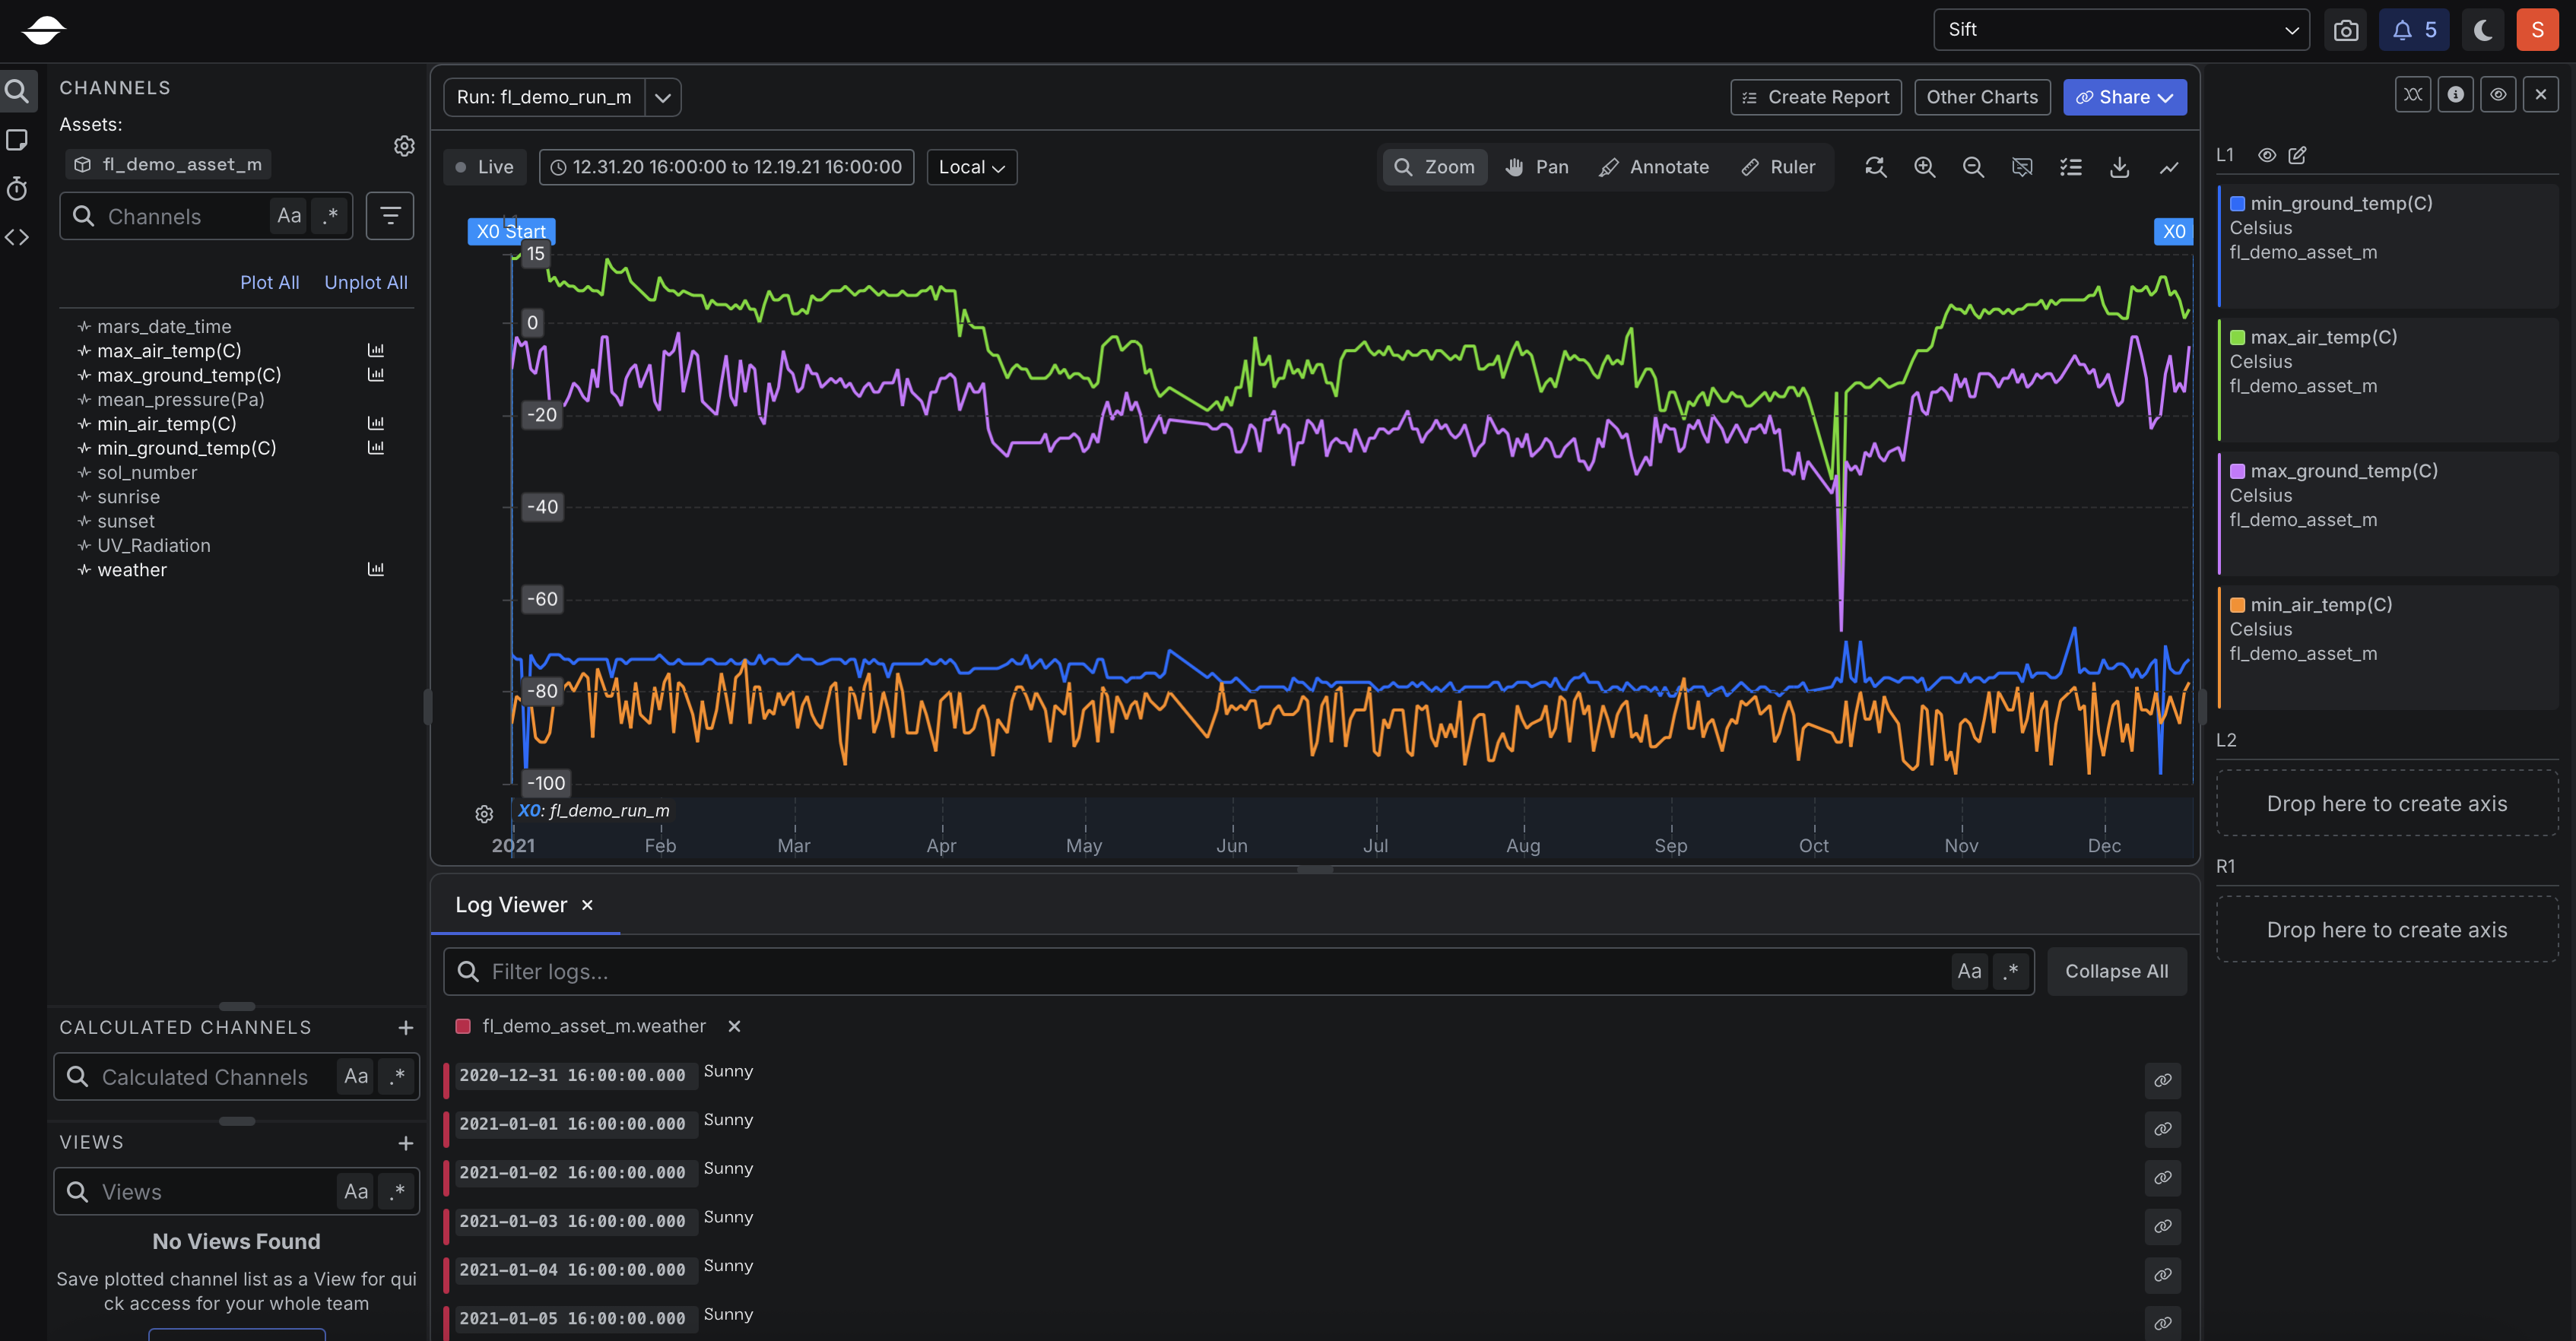
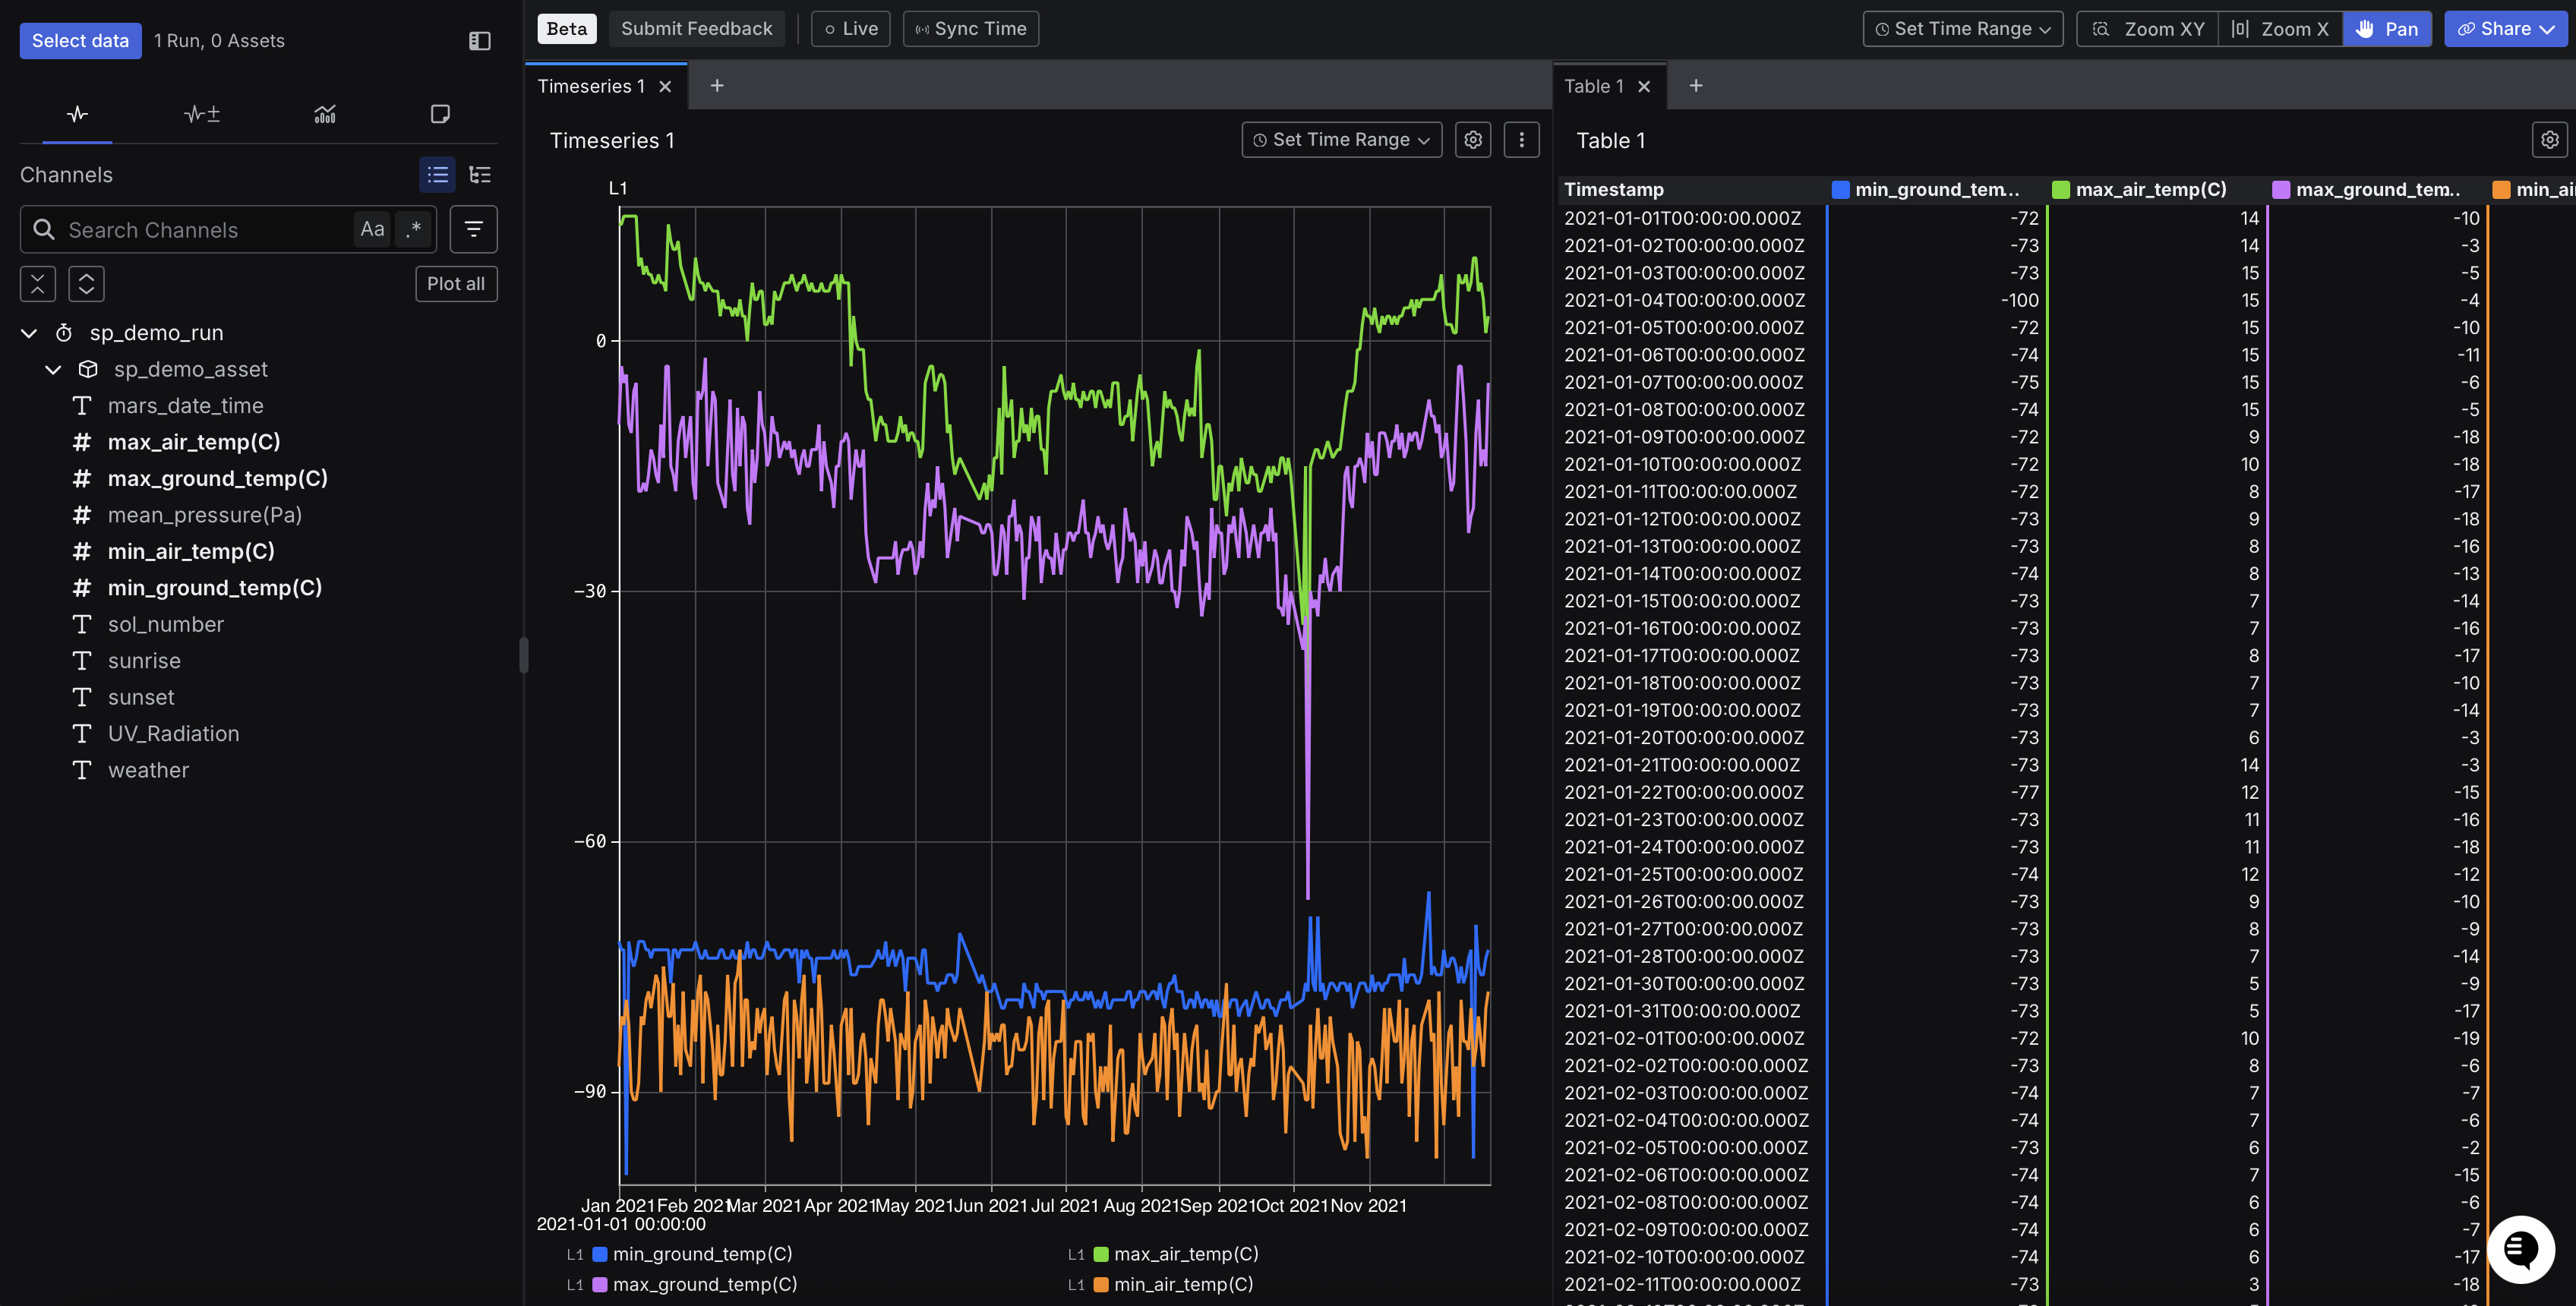
Now that we have imported the dataset using the REST API, let’s view the imported data in Sift.- In Sift, click .
- In the Run name or description box, enter the name of the Run.
- Click the name of the Run.
- with Explore v1
- with Explore v2 (Beta)
- Click Explore.
- Click the following Channels:
- min_ground_temp(C)
- max_air_temp(C)
- max_ground_temp(C)
- min_air_temp(C)
- weather